
Stretch a painting by numbers canvas step by step
This blog describes step-by-step how you can stretch a canvas on a stretcher† This so that you can hang the painting on the wall without a frame. Before you start, read all the steps carefully.
You need:
– Painting canvas
– Stretcher set (incl. thumbtacks)
- Hammer
- Ruler
– Hanging brackets from painting by numbers package
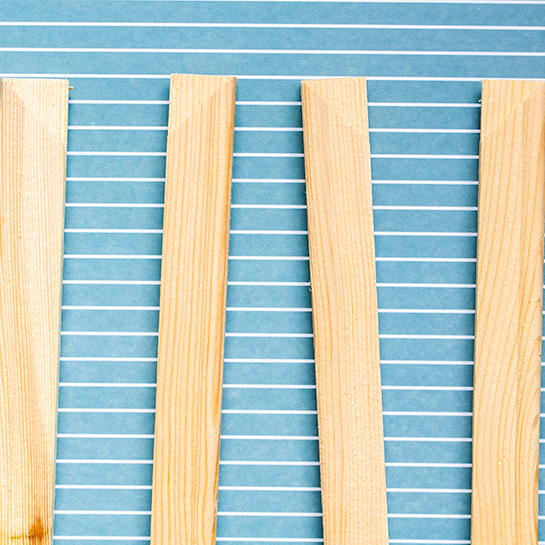
stretcher:
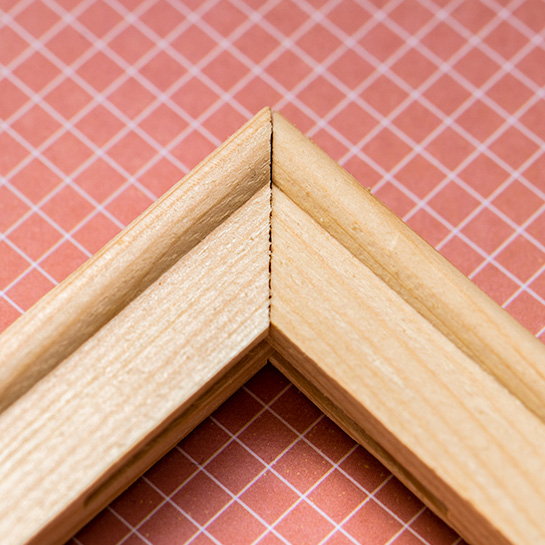
The simple stretcher consists of four slats that together form a rrectangle shape. The slats have a round raised edge on the outer edge of the front. This edge makes contact with the canvas. This edge ensures that the canvas is not damaged.
Step 1:
Make sure you leave the extra edge around the cloth. You will need this to stretch the painting.
Step 2:
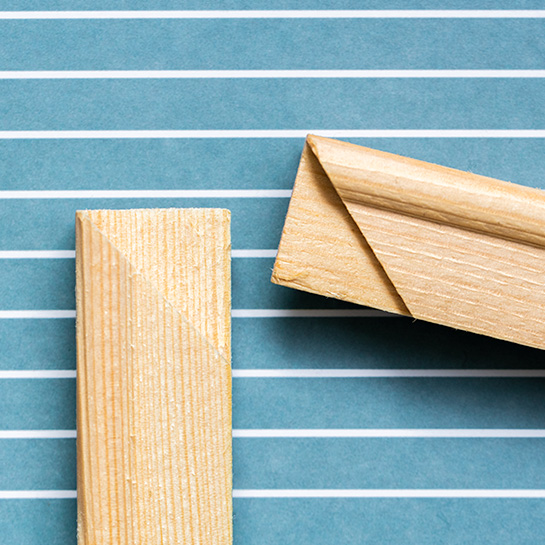
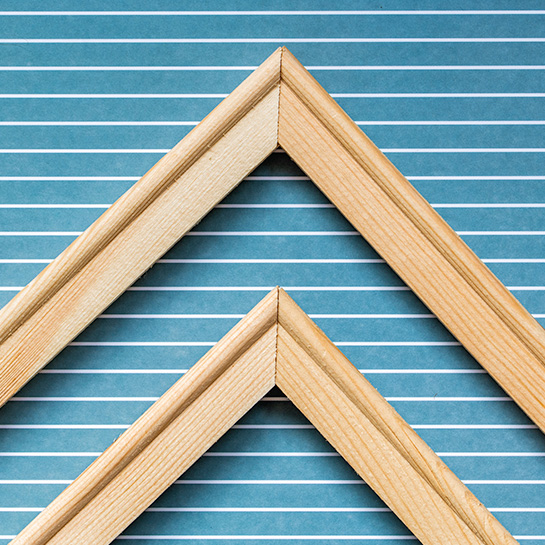
First assemble the stretcher. Connect the slats together and gently tap the corners with a hammer so that the joints are tight (do not put glue in between). Note that the stretcher is square, you can check this with a square.
Step 3:
Place the painting on a flat surface with the painted image facing down and then place the stretcher with the round side on the canvas. Then find the correct position. Positioning is done by folding the canvas over on all sides and watching how the paint line runs. If necessary, always move the stretcher with small pieces.
Step 4:
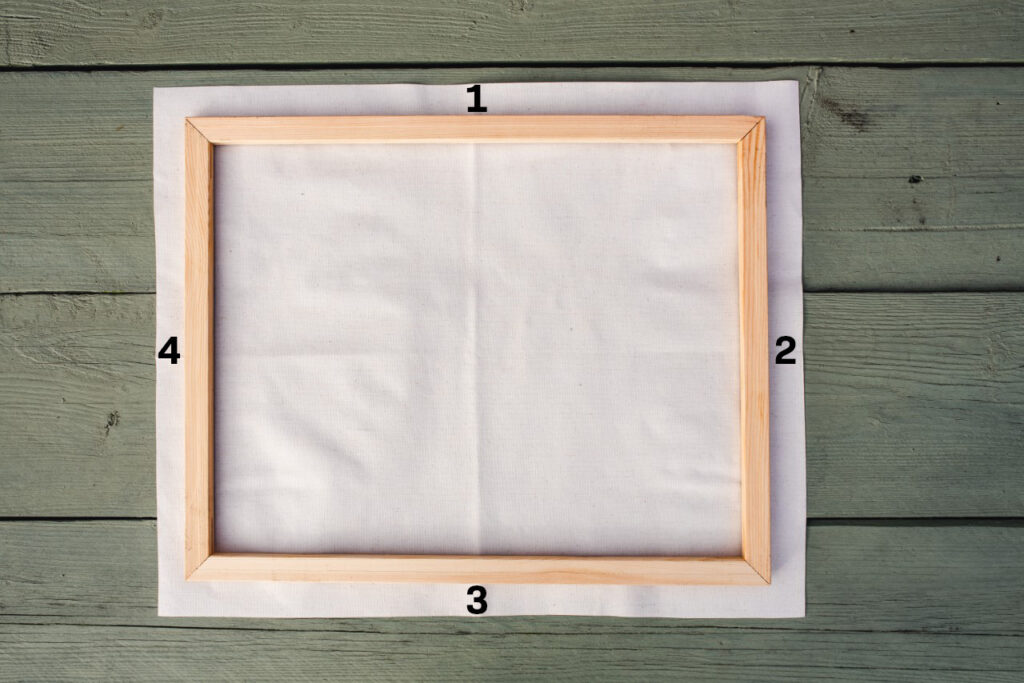
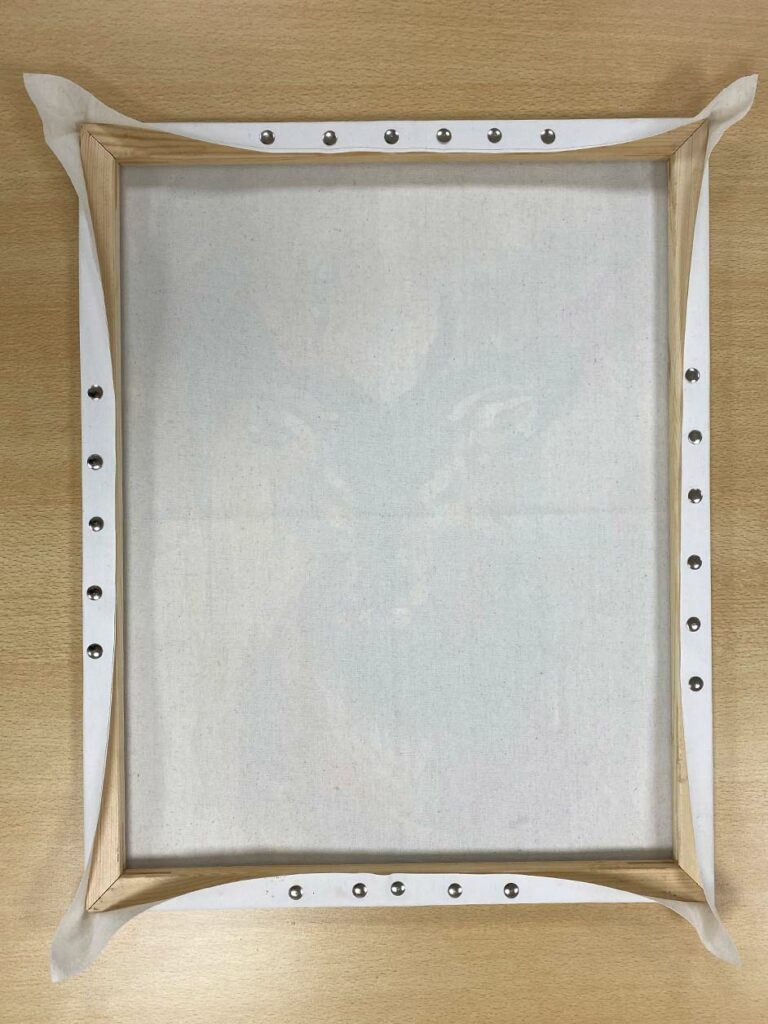
If the stretcher is in the right position, secure the painting at 4 points with a pushpin. First secure the painting in the center of each slat with 1 thumbtack. The points are indicated in the photo below.
Step 5:
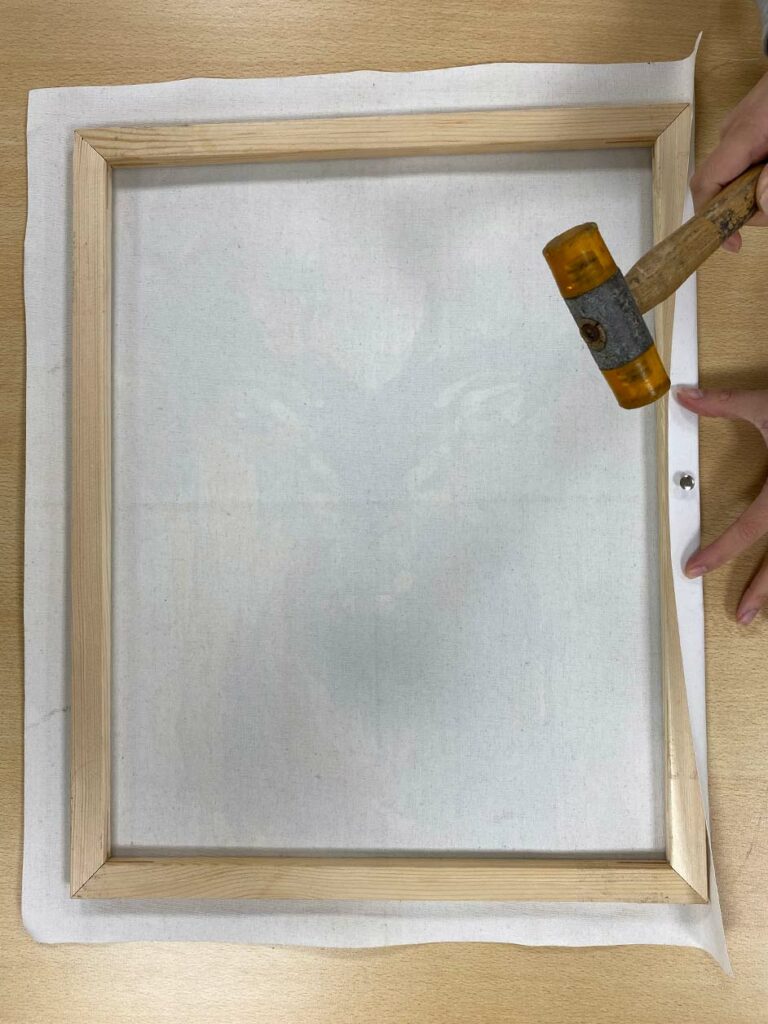
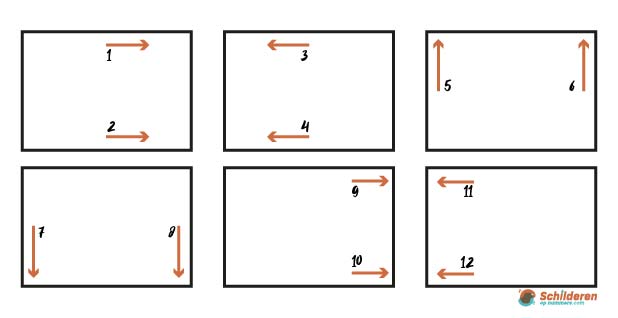
After that, proceed with securing the cloth. Start at the points in the middle that are already secured and work from the inside out. Follow the order below. Note, leave the corners loose for a while. This follows at point 6.

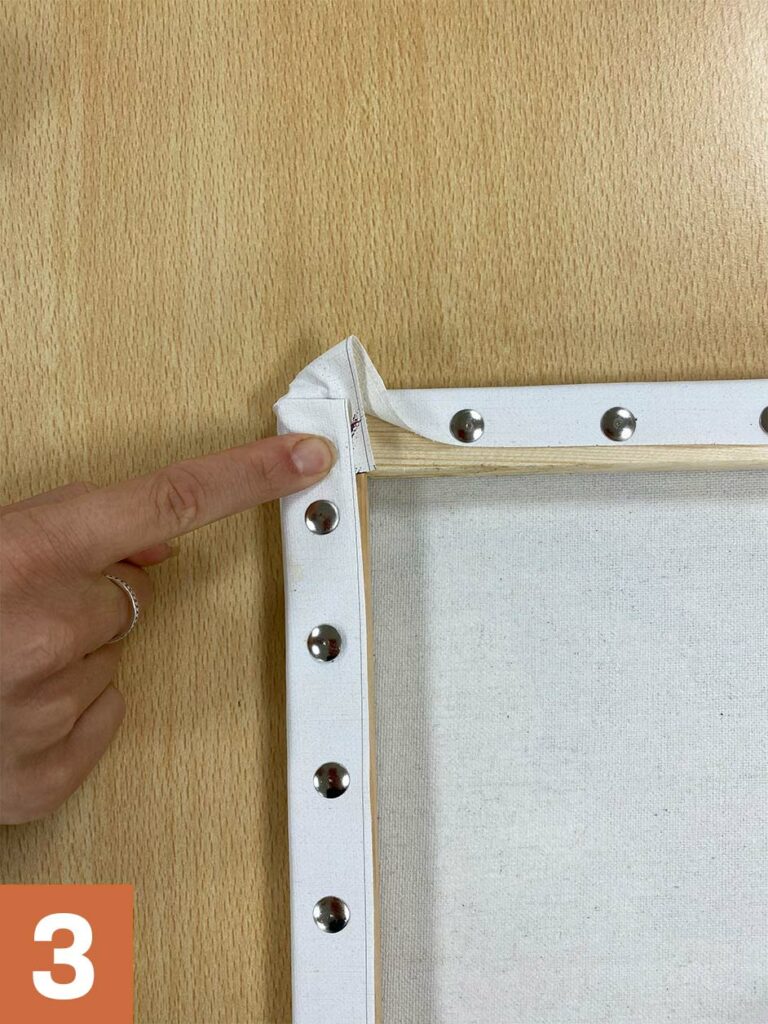
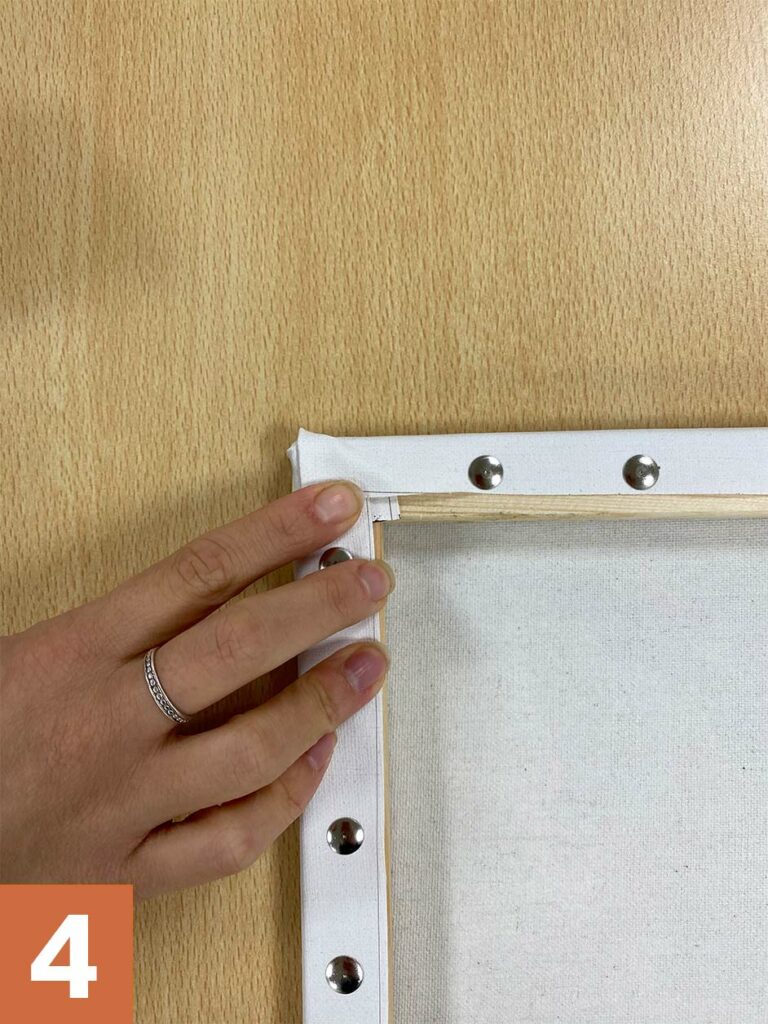
Step 6
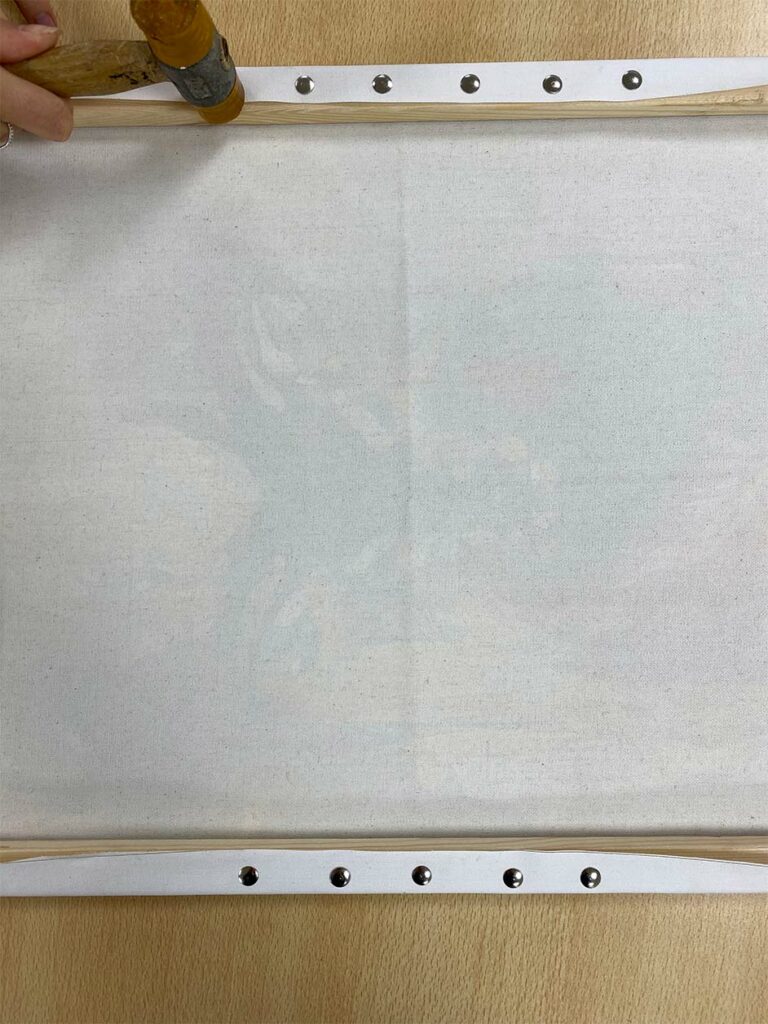
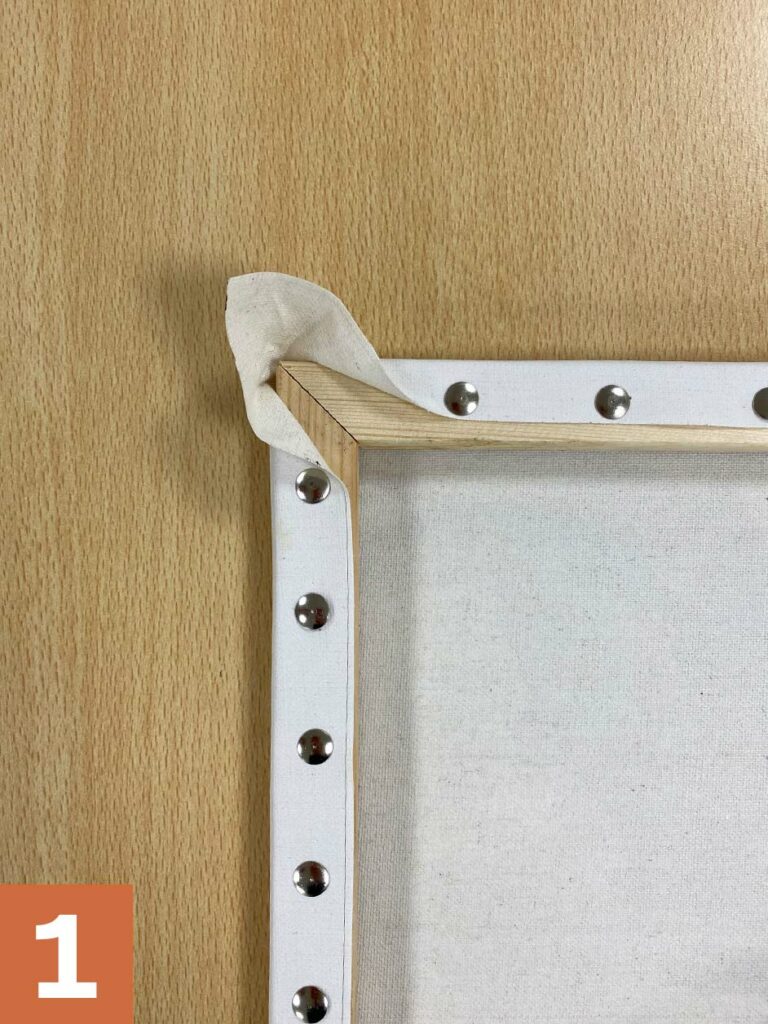
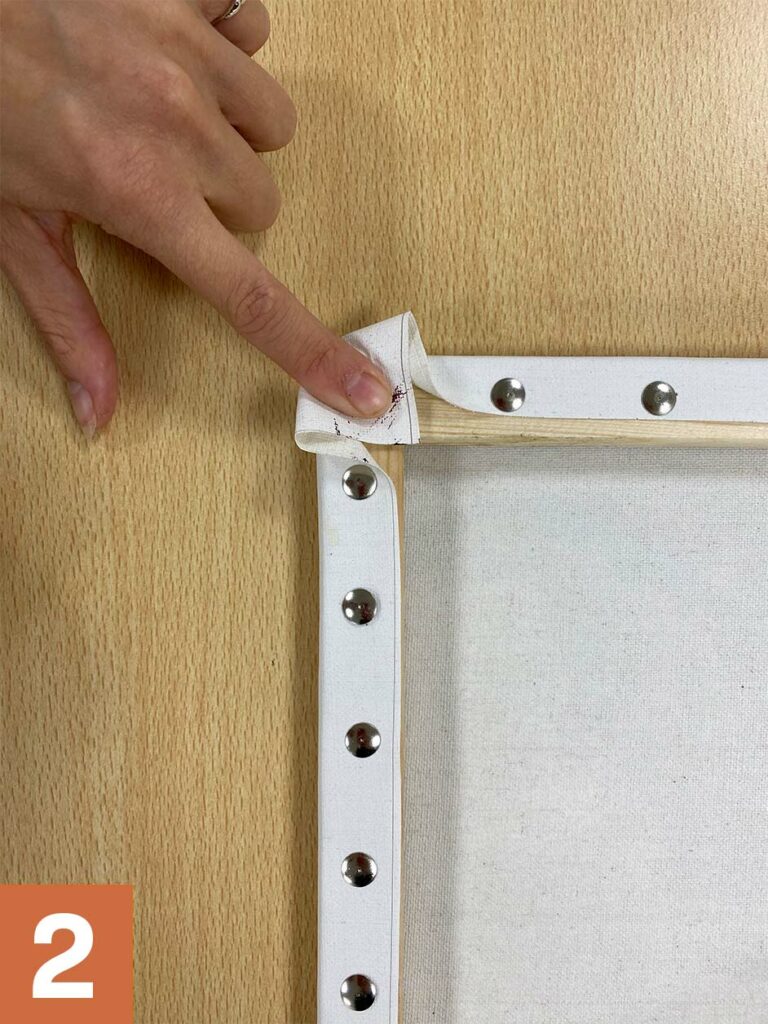
Finally, secure the canvas at the corners. Fold the corner inwards first and then fold the other sides over it and secure the cloth.
See below. Repeat the steps at all corners.
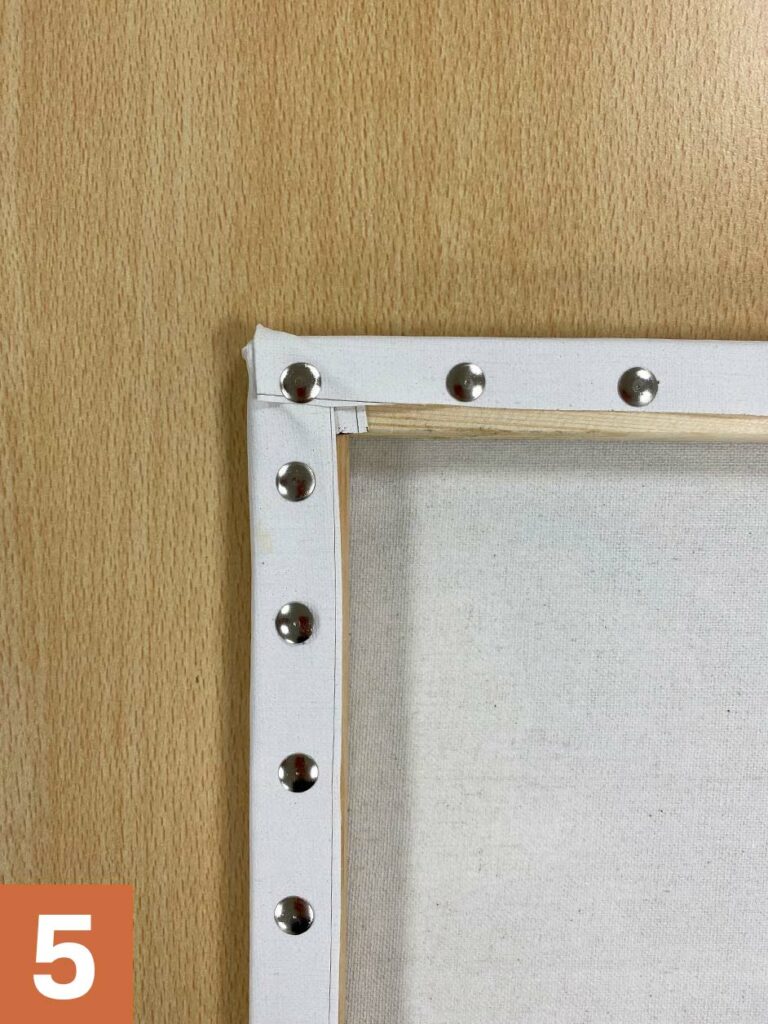
Step 7
Check that the painting is taut all over. If this is not the case, the part that is not good must be loosened and retightened. Take a good look at how you can get the cloth taut before you put it back on.
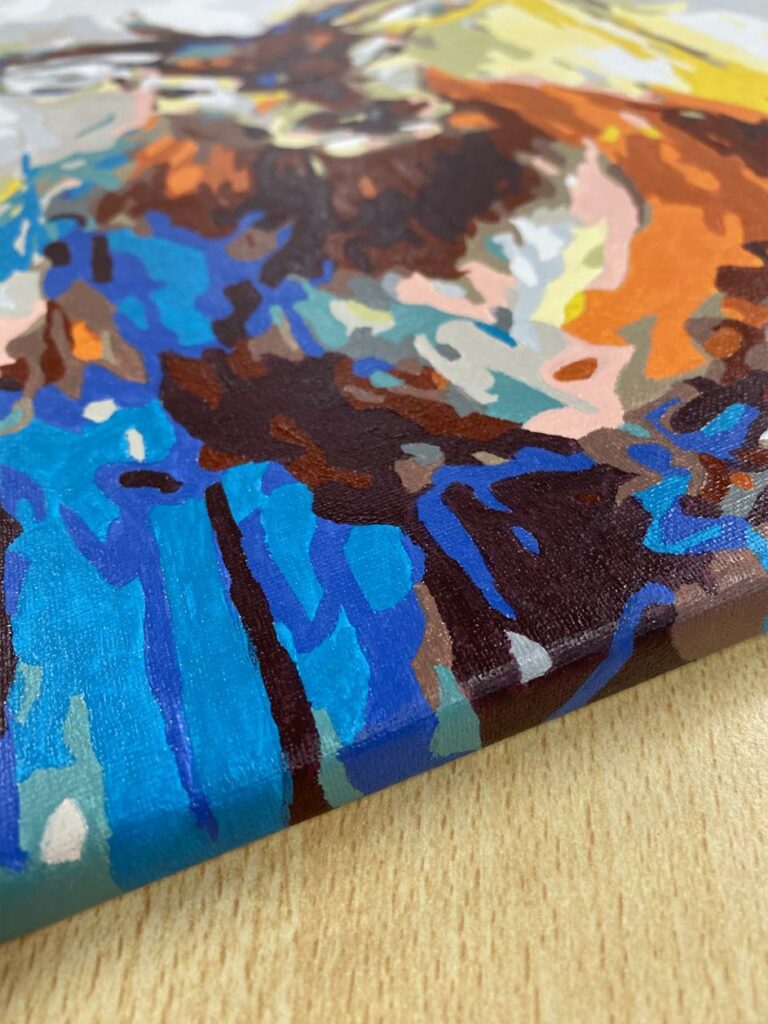
Step 8 (TIP)
Do you want to complete the final result? Then paint the edges of the painting with the paint you have left over. This makes it a beautiful whole and the painting is really finished.
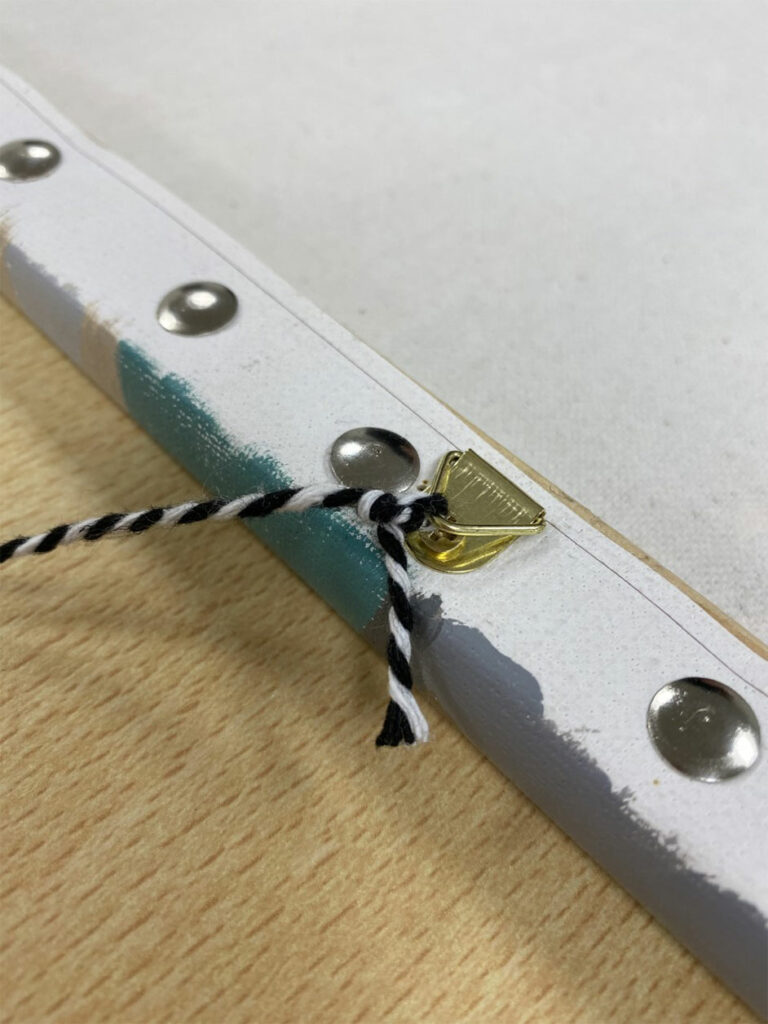
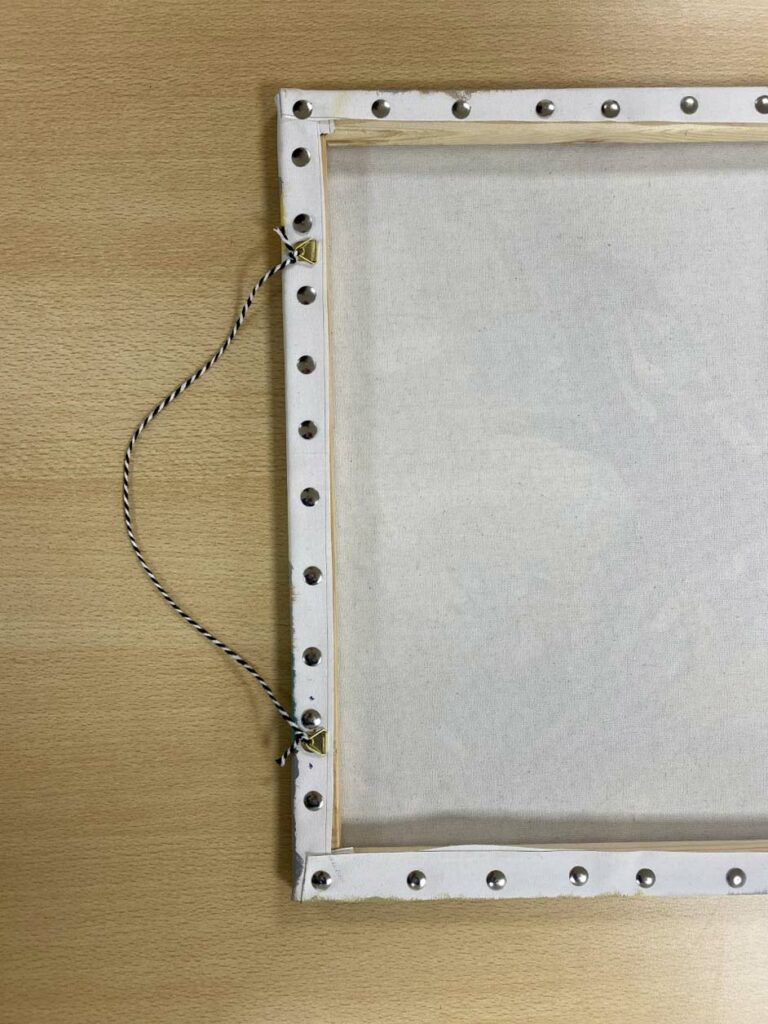
Step 9
Measure where you want to attach the suspension system. Screw here the suspension brackets that are supplied with the painting by numbers package. Put a thread through it and you're done.
Step 10
Choose a nice spot in the house and hang your painting!
You can buy a wooden frame with any painting by numbers canvas from our collection (XXL variants excluded).
Interested in a wooden frame? You will find this one here.
We at Webshop-outlet.nl are not liable if the tensioning on the stretcher is not successful.
Tensioning the canvas is at your own risk.